Environment Guide
The EAI simulation environment uses JSON configuration + general Builder.
Configuration location
All bootable environments are located at:
source/EAI_hmrs/EAI_hmrs/envs/<env_name>.json
It is recommended to run the robo environment that comes with the warehouse first:
python simulator.py --env robo
What is loaded is:
source/EAI_hmrs/EAI_hmrs/envs/robo.json
--env only passes the file name, without the .json suffix. The name can contain letters, numbers, underscores, and hyphens.
robo.json contains the currently supported robot set, with keyboard control enabled for each entity. Registry-driven human assets are not Env DIY robots; run them separately with python -u tools/human_assets/run_demo.py. See Human Asset Development for the development API and validation matrix.
Warehouse built-in environment:
Name |
Purpose |
|---|---|
|
Comprehensive rapid verification environment for multiple robots |
|
Carter minimal keyboard control environment |
|
Factory + Carter Nav2 Example |
|
Use EAI simulator to implement complex experimental demo |
Loading process
--env=<env_name>
  ↙ source/EAI/EAI/hmrs_env/env_diy/storage.py Read JSON
  ↙ source/EAI/EAI/hmrs_env/env_diy/flow.py Convert configuration object
  ↙ EAI_hmrs/env_builder.py build scenario, robot and attachment configuration
  ↙ EAI.hmrs_env.MultiRobotDirectEnv creates simulation environment
simulator.py is the unified entrance. External demos should start the environment through SimulatorLaunchConfig and open_simulator_session() and should not copy the environment build logic by themselves.
JSON structure
Minimal configuration example:
{
  "version": 1,
  "task_name": "my_factory_env",
  "scene_key": "factory",
  "robots": [
    {
      "type": "scout",
      "controller": {
        "mode": "default",
        "cfg": "SCOUT_DIFF_CFG"
      },
      "visual": {
        "x": 0.5,
        "y": 0.5
      },
      "attachments": [
        {"type": "orsus", "controller": null},
        {"type": "navigation_io", "controller": null}
      ]
    }
  ]
}
Main fields:
Field |
Description |
|---|---|
|
JSON schema version, currently |
|
Environment save name |
|
Scene type, such as |
|
List of robots, the order determines the default instance number |
|
Robot controller configuration |
|
Host robot payload: robotic arm, sensor or tool |
|
The layout position in the Env DIY interface, not the simulation birth coordinates |
|
Optional simulated birth pose |
Optional robot initial position
"spawn_pose": {
  "position": [1.0, 2.0, 0.5],
  "rotation": [1.0, 0.0, 0.0, 0.0]
}
positionis the world coordinate[x, y, z].rotationis the quaternion[w, x, y, z].When
spawn_poseis not provided, the Builder uses a generic default arrangement.python simulator.py --diy-3dwill write the completepositionandrotationfor each 3D edited host robot; saving will be refused if one of the two is missing or the vector length is incorrect.If the demo requires an experimental-specific initial location, it should be injected through
SimulatorLaunchConfig.env_cfg_hookand the general JSON should not be modified.
Instance Names
Builder generates instance names by robot type and order of occurrence:
carter_1
m20_1
m20_2
scout_1
External algorithms, ROS topics, attachment controllers, and demo configurations must use these instance names.
Payloads: Robot arms, sensors and tools
Env DIY organizes mountable objects using the following hierarchy:
Scenes
Robots #host robot
Payloads
  ├── Manipulators              # UR5, Z1
  └── Sensors                   # Orsus, LiDAR
Tools                           # Navigation I/O, Keyboard
The UR5 and Z1 are robotic arms that must be mounted on a host robot; they are not sensors or robots that can be spawned independently. In Env DIY, Go2, B2, M20, Scout and Lite3 support the ur5 payload, while Carter, Go2, B2, M20, Scout and Lite3 support the z1 payload. UR5 and Z1 cannot be mounted at the same time on the same robot; UI, JSON parsing, storage loading and Builder all check this mutual exclusion rule.
Builder selects the mount profile according to the robot type, creates the manipulator as an independent <robot>_arm articulation, fixes it to the host through a common FixedJoint, and automatically loads UR5_IK_CFG or Z1_IK_CFG. The current simulator.py calls setup_robot(...) with the corresponding model spec for UR5 and Z1 attachments actually mounted in the selection. Static declarations do not prove setup succeeded. UR5 provides:
/<robot>/ur5/target_pose
/<robot>/ur5/joint_command
/<robot>/ur5/joint_states
/<robot>/ur5/ee_pose
Z1 also provides independent gripper interface:
/<robot>/z1/target_pose
/<robot>/z1/joint_command
/<robot>/z1/joint_states
/<robot>/z1/ee_pose
/<robot>/z1/gripper_command
/<robot>/z1/gripper_state
For example, when Go2, B2 and two M20s are all mounted with UR5, the interfaces are located at /go2_1/ur5/*, /b2_1/ur5/*, /m20_1/ur5/*, /m20_2/ur5/* respectively. The controller works dynamically based on the actual registered robots in the scene, does not limit the number of instances, and does not rely on hard-coded robot lists to generate topics.
The general physical mount primitive is defined in source/EAI_assets/EAI_assets/robots/manipulator_mount.py, and the host profiles of UR5/Z1 are located in ur5_mount.py and z1_mount.py respectively. Different hosts only configure the installation rigid body, local installation pose, mass/inertia ratio and self-collision; when expanding a new host, you should add a new profile and do not copy the entire set of spawn functions.
In the main session, both ur5 and z1 attachments trigger manipulator graph registration; their topics become active only when that run’s setup_robot(...) succeeds. Neither manipulator interface depends on Navigation I/O. Navigation I/O uses the navigation_io attachment key in JSON and is mainly used to enable the chassis /<robot>/cmd_vel subscriber.
For the complete message format, control command and status reading method, please refer to Robotic Arm.
Env DIY
Enter Env DIY without passing --env:
python simulator.py --device=cuda:0
The visualization window and terminal quick mode use the same selection sequence: Scenes ↙ Robots ↙ Payloads ↙ Tools. In terminal mode, first select Manipulators and then Sensors in Payloads; the Isaac Sim 3D extension is docked on the right panel by default, and the two groups Manipulators/Sensors are used in Payloads. The underlying JSON still uses robots[].attachments[] to save the payload to be compatible with existing environment files.
The three build workflows: the visual editor, the in-simulator 3D plugin, and the guided terminal:
Visual editor |
Isaac Sim plugin |
Guided terminal |
|---|---|---|
|
|
|
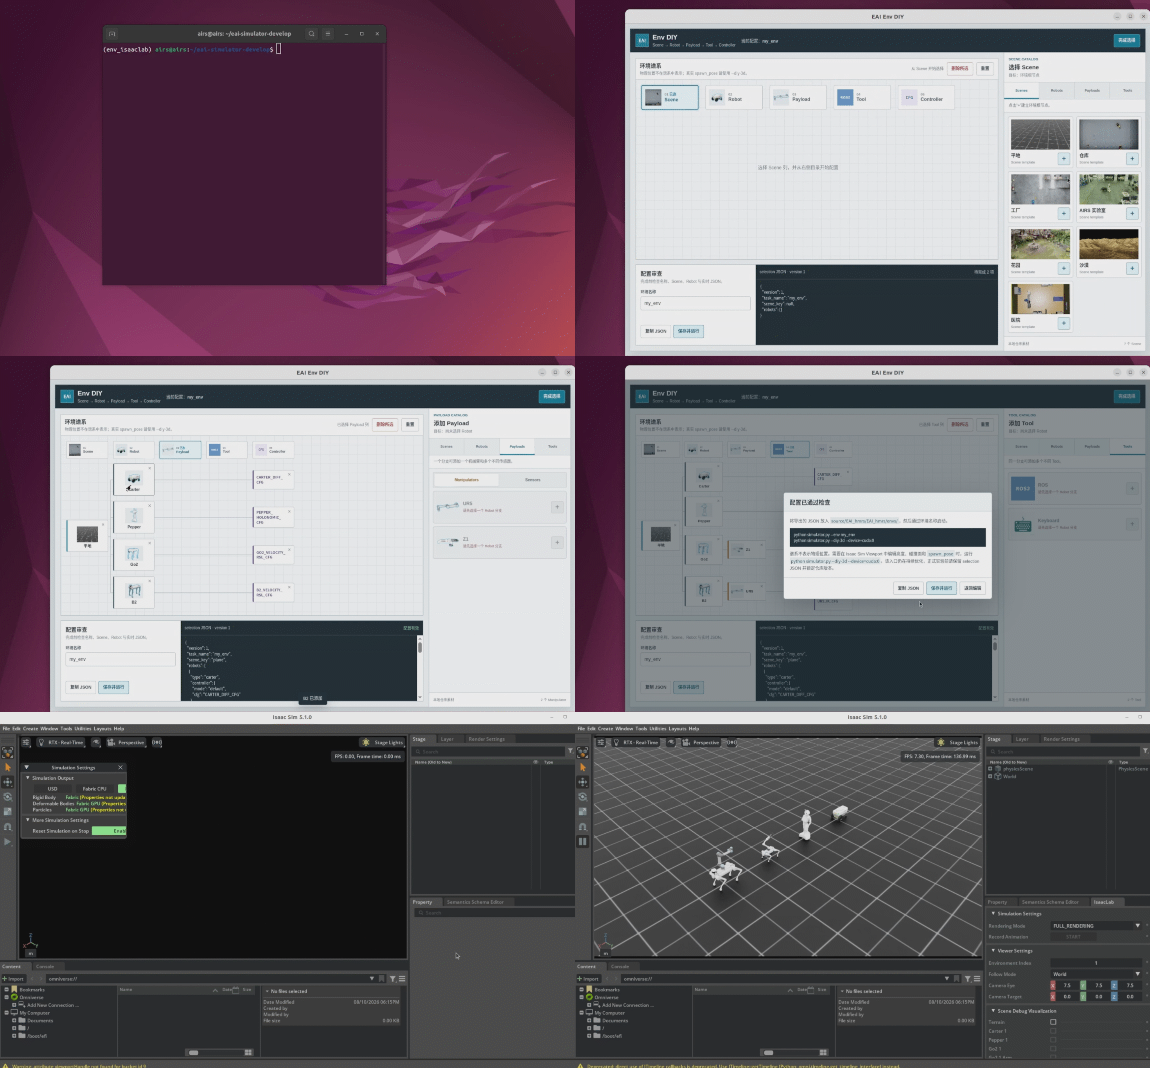
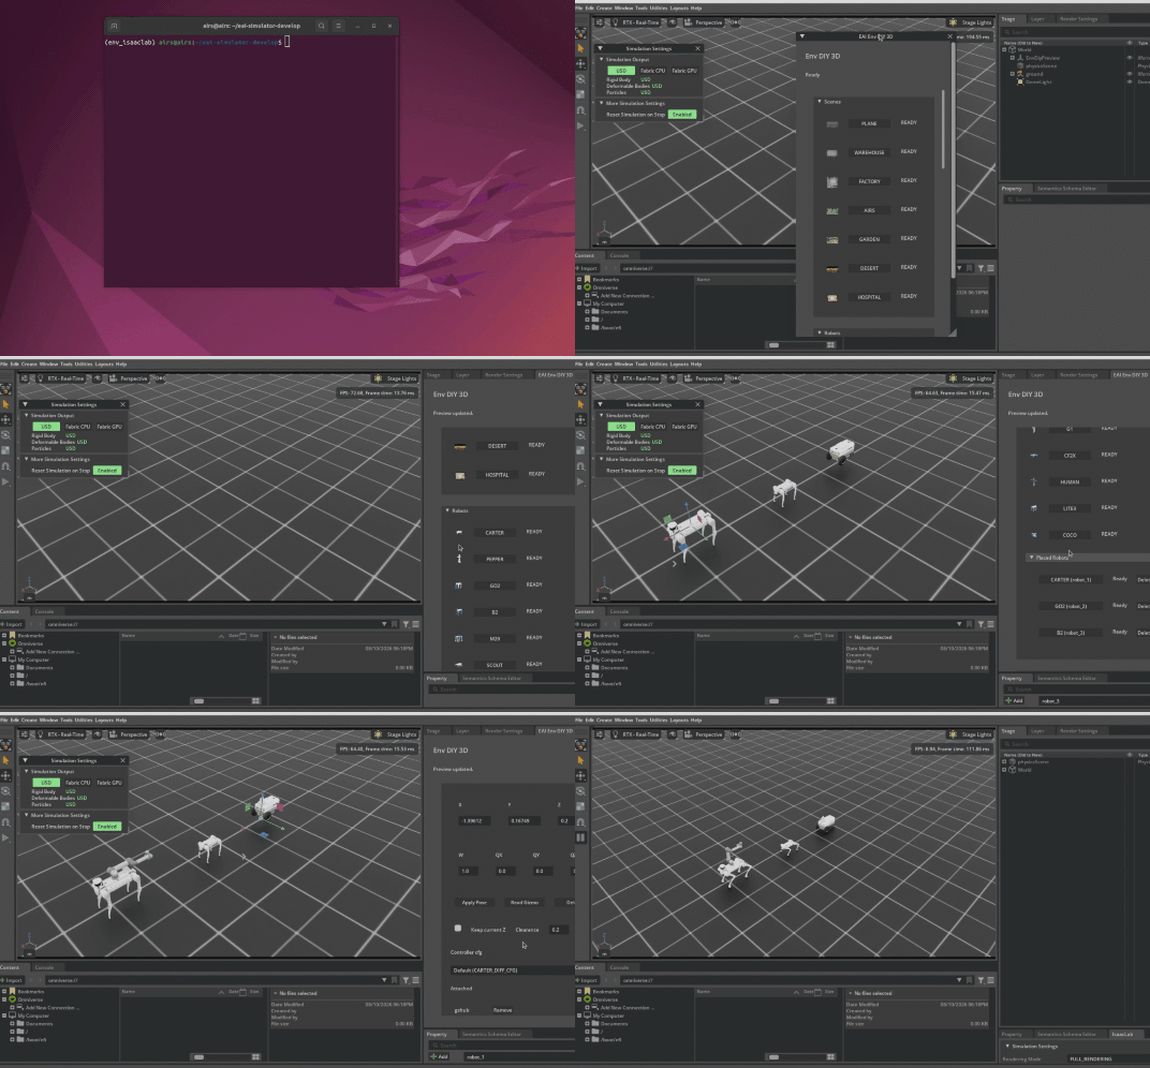
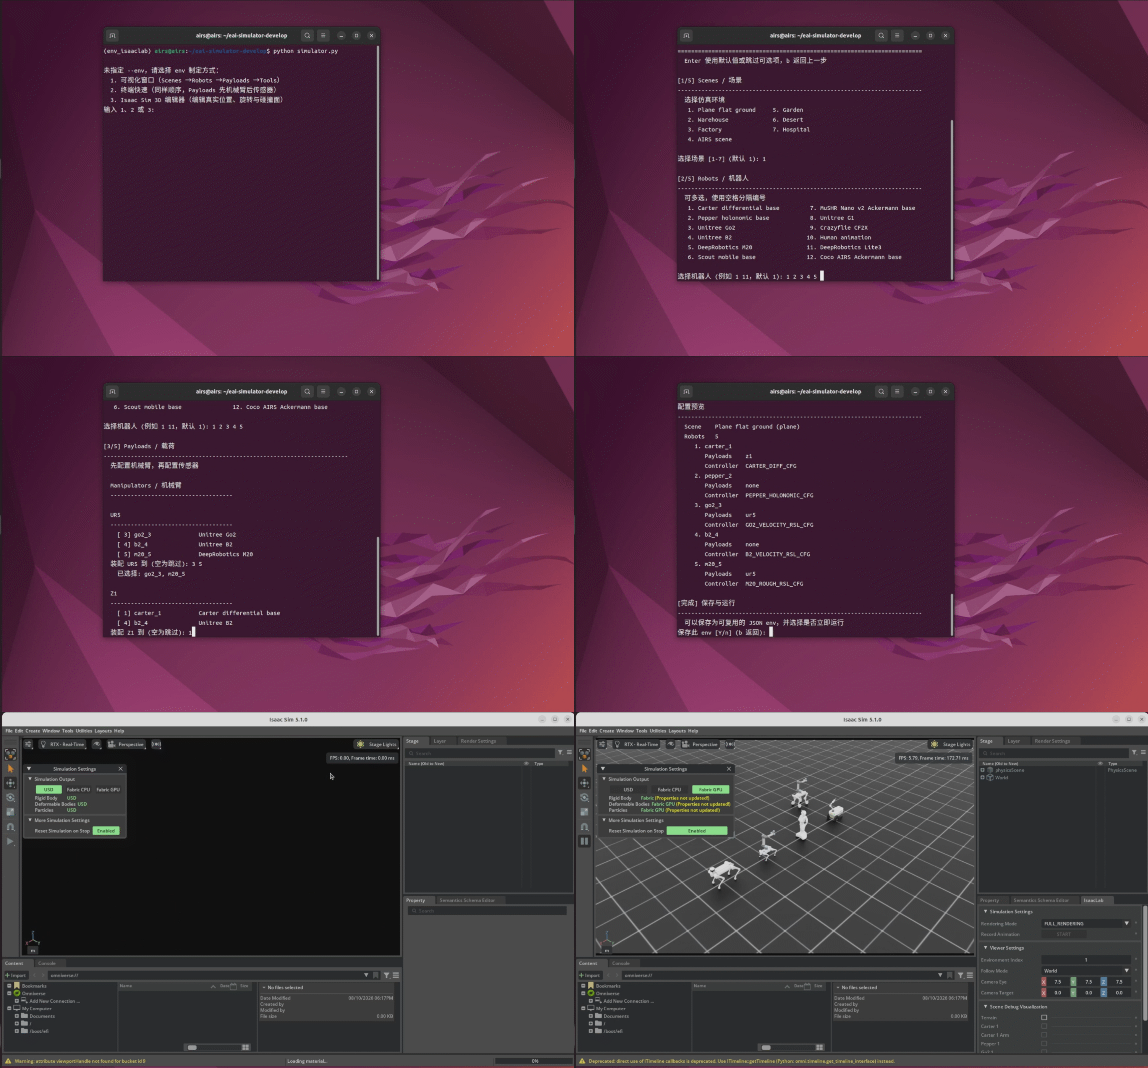
After completing the selection, you can run it directly or save it to source/EAI_hmrs/EAI_hmrs/envs/. Use the saved name when booting again:
python simulator.py --env=<env_name> --device=cuda:0
Isaac Sim 3D Pre-Run Editing
--diy-3d is the 3D entry point for Env DIY, in parallel with the default visualization window and terminal shortcut:
python simulator.py --diy-3d --device=cuda:0
Continuous optimization: This entrance is suitable for development, asset verification and controller joint debugging. Plug-in layout, asset catalog, download status and some controller interfaces may be adjusted with versions. It is recommended to retain the exported selection JSON before each run.
The plugin will be docked to the right panel when Isaac Sim is launched. After selecting Scenes, Robots, Payloads and Tools, the real 3D position can be edited in the Viewport with a transform gizmo or numeric field; Snap snaps to the surface using collision geometry, and the height and rotation in spawn_pose are written to the formal environment. The browser tutorial only shows ownership relationships, and its exported visual.x/y values are compatibility placeholders; the lightweight window uses visual.x/y only for its 2D layout. Neither represents a physical spawn position.
UR5/Z1 belongs under Payloads > Manipulators, must be mounted to a compatible host, and cannot be dragged as an independent robot. When the host moves, its attachment moves with it. For manipulator controllers and ROS2 topics, see Manipulator Control.
You can download assets individually on the card before running, or you can use Download all and run to prepare the USD, materials, textures and controller cfg required for the current selection at once. Gated Hugging Face assets complete authorization through Request, terminal hf auth login and Recheck, and the plug-in does not receive or save tokens.
After clicking Run, the program uses only one Isaac Sim AppLauncher: first destroy the preview stage, and then create the formal environment in the same Kit process. When a robot or attachment fails to be generated, other successful objects will be retained; you can try again in the original editor after correcting or downloading dependencies. At the current stage, only editing before simulation is supported. Dynamic addition, deletion and movement during operation are follow-up functions.
The interactive browser tutorial is available in the Env DIY Workbench. It guides configuration and selection JSON export through the Scene → Robot → Payload → Tool → Controller lineage; use the --diy-3d entry point above to edit real 3D positions.
External Demo interface
from simulator import SimulatorLaunchConfig, open_simulator_session

launch = SimulatorLaunchConfig(
    env="EAI-Factory-v0",
    device="cuda:0",
    num_envs=1,
)

with open_simulator_session(launch) as session:
    env = session.env
    while session.simulation_app.is_running():
        # Generate actions and then call env.step(actions)
        pass
To modify the initial position of the robot:
def configure_env(env_cfg):
    env_cfg.scene.robots["scout_1"].init_state.pos = (6.0, 5.5, 0.2)

launch = SimulatorLaunchConfig(
    env="EAI-Factory-v0",
    env_cfg_hook=configure_env,
)
For specific demo, please refer to demo/fire_rescue/README.md.
Add new environment
It is recommended to use Env DIY to generate JSON. When writing manually, you must also meet the current schema and ensure that the referenced robot, controller and attachment configurations can be parsed by EAI_hmrs/env_builder.py and EAI_hmrs/controller_loader.py.
Verify directly after adding:
python simulator.py --env=<new_env_name> --device=cuda:0